Carpets make your home look cozy and provide a comfortable feeling under your feet. However, they absorb all the dust, dirt, and debris and need regular cleaning. Using a Hoover carpet cleaner with washing and rinsing functions at least once a year will make your carpet look brand new and considerably cleaner.
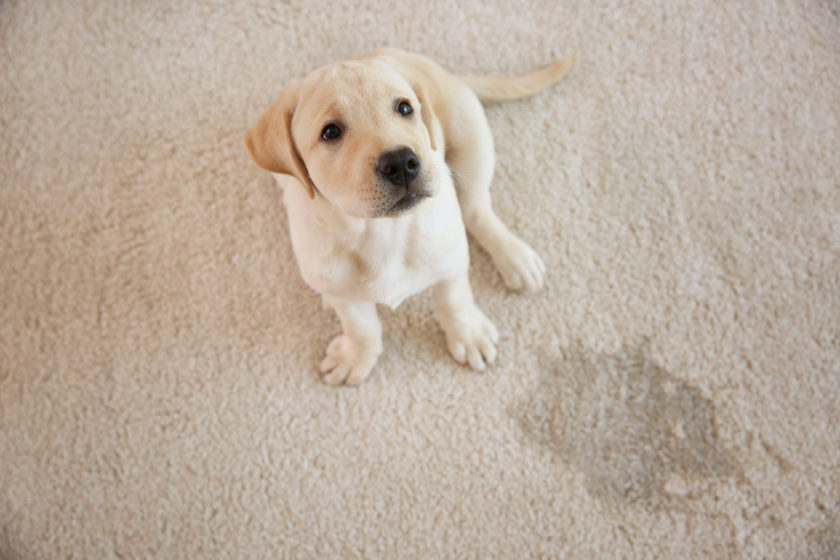
Children often like playing on the carpets. However, in families with kids and pets, they need more frequent care and attention due to the appearance of food stains, pet hair, and other unexpected surprises. The question of deep carpet cleaning is very sharp for people suffering from allergies.
Regular vacuuming copes only with small debris and dust at the top layer of the fibers. Even cleaners with strong suction can’t remove all the dirt trapped deep inside the pile. The fibers fade, become less soft, and look shabby and messy. Hoover carpet cleaners provide quick and efficient deep carpet cleaning and allergy protection for all members of the family..
Related Reviews:
- Best Hoover Carpet Cleaners
- Best Hoover Carpet Cleaner Solutions
- Best Hoover Vacuums
- Best Hoover Cordless Vacuums
You may rent or purchase a cleaning machine for this purpose, but in any case, you will be pleasantly surprised by the results and will never regret your decision. A Hoover carpet cleaning is an easy and affordable alternative to professional cleaning services. The best news is that you don’t need any harsh chemicals and special equipment. Hot water and a special cleaning solution will be enough.
Preparation phase
Before you actually move on to cleaning your carpets you need to perform several simple steps to get ready. Pre-cleaning work includes preparing the floors and the hoover.
Prepare the floors
Step 1 Choose a carpet cleaning solution
The first is to get a special carpet cleaning solution. Think about your needs and choose the most suitable one. There is a wide variety of carpet cleaning solutions available on the market for example for general copied cleaning or some special purposes like treatment of odors and stains from pets. There are even special cleaning solutions against stiff food stains.
Step 2 Clear the space
The second important state during the preparation is to free the area for hoover carpet cleaning. Take away all the possible furniture and other objects. If there is no way you totally empty the room remove the furniture to one half to clean the second one first. After a while when the carpets are dry, you will have to repeat the procedure again and clean the other one.
If you don’t want to for some reason or it’s impossible to move some pieces of furniture wrap their legs with film to keep them dry. Besides, wood may leave some stains on your wet carpet. Long curtains must be tied up not to get in contact with your wet carpet. Remember that you will have to allow your carpets to dry.
Step 3 Vacuum the floor
Clean the carpet properly with your ordinary dry vacuum cleaner to remove all the dirt small debris hair from the pile. It will facilitate your main job greatly and improve final results. If you see some obviously stiff stains on the surface treat them with a special cleaning solution after the carpet has been vacuumed but before your main job.
Get your Hoover carpet cleaner ready
Step 1 Place your carpet cleaner on the tiles
To prevent spills on the carpet perform all the preparation work on the tile or linoleum floor. In the process of filling the tank with water, there may be some spills, which won’t be a problem for you on the hard floor. Be careful with hardwood floors as the solution and water spills can damage its attractive look. Unplug the unit for security, while you are doing any manipulations with the water.
Step 2 Pour some hot tap water
Most models of Hoover carpet cleaners have two separate tanks for clean and dirty water. After the power cord is taken away from the outlet, look at the tanks and find the lock button. The release button is often located at the back. Press the button to unlock. Detach the clean water tank, pulling out the handle gently, open the cap and fill it with hot tap water up to the line of the required volume. Before usage, it is recommended to rinse all the canisters with warm tap water. There is no need to use any additional cleaning solutions.
Step 3 Fill up the solution compartment
Now it’s the turn of the detergent. Following the instructions and depending on the construction of the cleaner, you may need to measure some amount of solution and add it to the clean water tank or fill up a separate cleaning solution compartment. Read the recommendations on the detergent carefully and make sure you don’t overdose.
Step 4 Place the water tank back
Before returning the tank check and wipe all the dirt with a wet cloth from the nozzle and the front part of the cleaner head, if needed. For comfortable cleaning put the head in a low position. When you finish, push the nozzle up to place it over the channel. Locate the filled clean water tank back in its place. Pull it back a little until you hear a snap. It means that the water tank is locked in its place and located properly on its base. Check it again to prevent any leaks.
Step 5 Wash the brushes
To ensure absolute purity who washes the brushes which may be left dirty after the last performance of the hoover. Lean your carpet cleaner backward. The handle must be on the floor. Pull out both brushes at different ends from the head of the unit. Rinse them under the cold water without any detergents to get rid of all the small debris, dust, and dirt from the previous session.
Step 6 Assemble the cleaner head
On the cleaner, you will see some tabs on the brush in special slots on every side. Align them accordingly. Check the post in the center of the cleaner head and align it as well. Finish the assembly locking all the parts properly.
Step 7 Wipe the brush filter
The last step is checking and cleaning the brush filter if needed to guarantee excellent results. Take out the frame with the filter from the bottom of the cleaner head. Don’t be harsh. Pull out the frame gently until it easily slides out. Wipe the filter with a wet cloth. Return it to its place in the cleaner head. Now you are completely ready to clean your carpets.
Cleaning phase
Step 1 Adjust the settings
In case your Hoover has various settings choose the washing function. Start from the further end of your room in order not to step on the wet carpet. Turn the machine on.
Step 2 Press the trigger
When you start pushing the hoover forward press the trigger slowly. The solution will be released and the carpet will get wet. The movements must be very slow even slower than while a regular vacuuming. Don’t be in a hurry, and wash the carpet foot by foot.
Step 3 Pull it back
With your fingers pressing the trigger pull the machine backward slowly or was the same area. After the first so-called wet stroke, described in step 2, this will be the second wet stroke. Now the cleaner gathers all the debris and dirt from the pile. With some difficult stains, you may have to repeat those wet strokes again until the target disappears.
Step 4 Finish the spot
Without pressing the trigger move the unit again for what and backward to finish washing the sport. These are called dry strokes. Such movements allow the vacuum to absorb all the remains of dust and dirty water from the surface. Repeat this action until you see that a very small amount of water goes to the dirty water tank. at least two dry strokes are very important to finish washing the spot.
Step 5 Overlap the last row
Cover about one inch of the previous row not to leave any dirty gaps on your carpet. Always overlap the last row until you finish the whole room. Normally you will have to make two wet strokes and two dry strokes for each spot. If the area is large you may need to refill the water tank with clean water and solution and empty the dirty water tank.
Step 6 Refill if needed
If you notice any changes in the work of the Hoover carpet cleaner such as a loss of suction or unusual sounds check the dirty water tank. It may cause some trouble if it’s full. Empty the dirty water compartment and refill the clean water one if needed. Don’t forget to rinse it before replacement. To release the tank, unlock it at the top or press down the handle.
Final rinsing and drying
Step 1 Switch to the rinsing function
Many models of Hoover carpet cleaners have a separate rinsing function so adjust the setting and continue the job. There’s no need to refill the clean water tank.
Step 2 Refill the clean water tank
In case you don’t have a separate rinsing setting you have to refill the clean water tank with warm water. Take the clean water compartment and empty it to perform the next step. Before filling it with the new warm water rinse it properly. Place the tank back.
Step 3 Rinse with double wet and dry strokes
using the same approach of double wet and dry strokes perform rinsing over the surface foot by foot. Rinsing is important as it removes the solution left from washing from the pile of your carpet.
Step 4 Let it dry
The carpet must dry completely. You have to leave it for several hours without walking or moving the furniture back in its place. If you are too early it may get dirty again. In case you have a large fan at your disposal you may use it for decreasing the time of drying. Point the fan at your carpet but don’t put it too close not to spoil their covering.
Related Reviews:
- Hoover PowerDash FH13010PC
- Hoover FH50150 Power Scrub Deluxe
- Hoover SmartWash FH53000PC
- Hoover FloorMate FH40160PC
Conclusion
Hoover carpet cleaning is recommended at least once a year to maintain the covering fresh and clean. It’s a great alternative to professional cleaning. As with any other equipment carpet cleaning requires thorough preparation and care to guarantee the ultimate cleaning results. During the stage of washing and rinsing always remember about the method of two wet and two dry strokes for each section. And finally, always allow enough time for your carpet to dry completely. If you walk or move the furniture too early, you will have to repeat the whole performance again. Be attentive to details and patient and you will enjoy your brand new, fresh and clean carpets.

